


Showing posts with label Focal Point. Show all posts
Showing posts with label Focal Point. Show all posts
Friday, May 11, 2012

When you are redesigning a Bedroom
the focal point of the room should be the Bed.

BEFORE

AFTER
How do you make the bed the focal point?
1. Layers on the bed---pillows and bedding.
2. Something above the headboard that helps
to draw your eye to the bed.
3. Lamps on each side of the bed create
a warm and inviting feel to the space.

A few accessories on the night stand also add to the focal point.


See what you can do to make your bed more of a focal point!
Wednesday, September 28, 2011
When Redesigning a Bedroom--- Make the Bed the Focal Point of the Room
4 comments Posted by ImagineCozy at 11:15 AM
The bed makes a wonderful focal point
when redesigning a bedroom.

BEFORE
The homeowner of this master bedroom,
was trying to give it a new look.
She had purchased new bedding
but it was not enough to give the room a change.
We just needed to rearrange a little
and add some interest with fabric!

AFTER
When you are redesigning a bedroom
you usually want the bed to be the focal point of the room.
So we moved the bed to the wall between the two windows.
Doesn't that create a very nice focal point?
See how the layering of pillows and bedding
really does make the bed stand out.
The coordinating curtains give the room some drama and elegance.

BEFORE
The bed was on the opposite wall
so when you entered you did not really see it.

AFTER
See how we created a nice balance on that wall across from the bed.


The homeowner purchased fabric and hemmed a coverlet
for the end of the bed as well as the curtain panels.
So simple... just hem the sides and the ends and hang with curtain rings.
It really makes a difference!

What a beautiful and relaxing retreat!
Take a look at your bedrooms---
What could you do to create more of a focal point?
Thursday, July 15, 2010

This bathroom started out as pretty ordinary.
But ended up fantastic, by adding just a few design principles.

BEFORE
The homeowner had a number of interesting items that she wanted to put in the space but did not know how to pull it all together.

AFTER
Doesn't this feel so much more cozy!
What made the difference?
1. We used the art on the wall as inspiration.
See how we took three colors and tied them around the room.
Green, aqua blue and brown.

BEFORE
She had the same shower curtain, towels and rug.

AFTER
2. We made a few groupings to create a focal point.

BEFORE
The wall had no focal point.
There was nothing for your eye to focus on.

AFTER
See how we created a grouping and it made for a very nice focal point.
By hanging a shelf above the towel rod
we could make a grouping with the towels and the items on the shelf.
There is also a nice grouping above the toilet--
the art and wicker basket with the towels and sea turtle.

3. We were able to pull a theme throughout the bathroom that helped to tie it all together.
Notice the sea shells and starfish.

Also see the repeating leaf motif that is in the art, tissue box, towels and shower curtain.

We hung the wreath on the outside of the door, but it makes a beautiful addition to the room when the door is open. See the starfish and seashells as well as some leaves.

I loved this little leaf hook --- it also went with the theme of the room.
We hung a lace hankerchief and a couple of pearl bracelets just to add some whimsy to the room.
1. We used the art on the wall as inspiration.
See how we took three colors and tied them around the room. Green, aqua blue and brown.
2. We made a few groupings to create a focal point.
3. We were able to pull a theme throughout the bathroom that helped to tie it all together.
Notice the sea shells, star fish and the leaf motif.
See what you can do with a space in your house
just using these 3 principles.
just using these 3 principles.
Monday, April 19, 2010

Today I am going to give you the answers to the Redesign quiz that we had on this lovely Living Room!

BEFORE

AFTER
The first thing we did was create a more balanced feel to the room by moving the furniture so that weight was evenly distributed throughout the space.
So... BALANCE to the room.

BEFORE

AFTER
See how we were able to take a few things away and it feels more evenly weighted.

We added tables. TABLES allow you a space to accessorize.

We created more of a FOCAL POINT. A fireplace is a natural focal point in a room. If you can emphasize it more with a few interesting accessories it is a place that your eye is drawn to. The little gold couch is a very special piece and quite unique. The mirror that we placed above the fireplace is the right scale for the wall and it creates more light and movement to the room.

LIGHTING.
We turned on the lamp! See how it really warmed up the space. It creates a warm and inviting feel to the room.

We brought in a few NATURAL ELEMENTS. The Green plant and ...

The BASKET of PINECONES. Also notice the wicker baskets under the couch in the previous photo and the basket with the pinecones. This adds a nice TEXTURE to the room.

We brought in this little cabinet. It was a perfect piece to use for accessories and add some personality and the color works great.

See how we chose just a FEW items to place on the inside. This makes it more pleasing to look at and highlights what is there.
In this BEFORE photo you can see that the little cabinet was at the end of the hall.

It is always fun to add a little wimsy to your room. This little frog prince reading on a stack of books was just FUN!

BEFORE

AFTER
YOU can really feel the difference! And this was done using just what she had in her home already.
You can really see her style can't you.
We all have a certain style --- if you look around your home you will see there are some things in common.
Whether it is colors or shapes, you will notice when you shop you are drawn to certain kinds of items.
So as you follow these simple little design tips that I shared with you today you will be able to transform a space in your own home --- HOW FUN!
I am joining Susan today at Between Naps on the Porch for some fun BEFORE and AFTERS.
Thursday, March 25, 2010
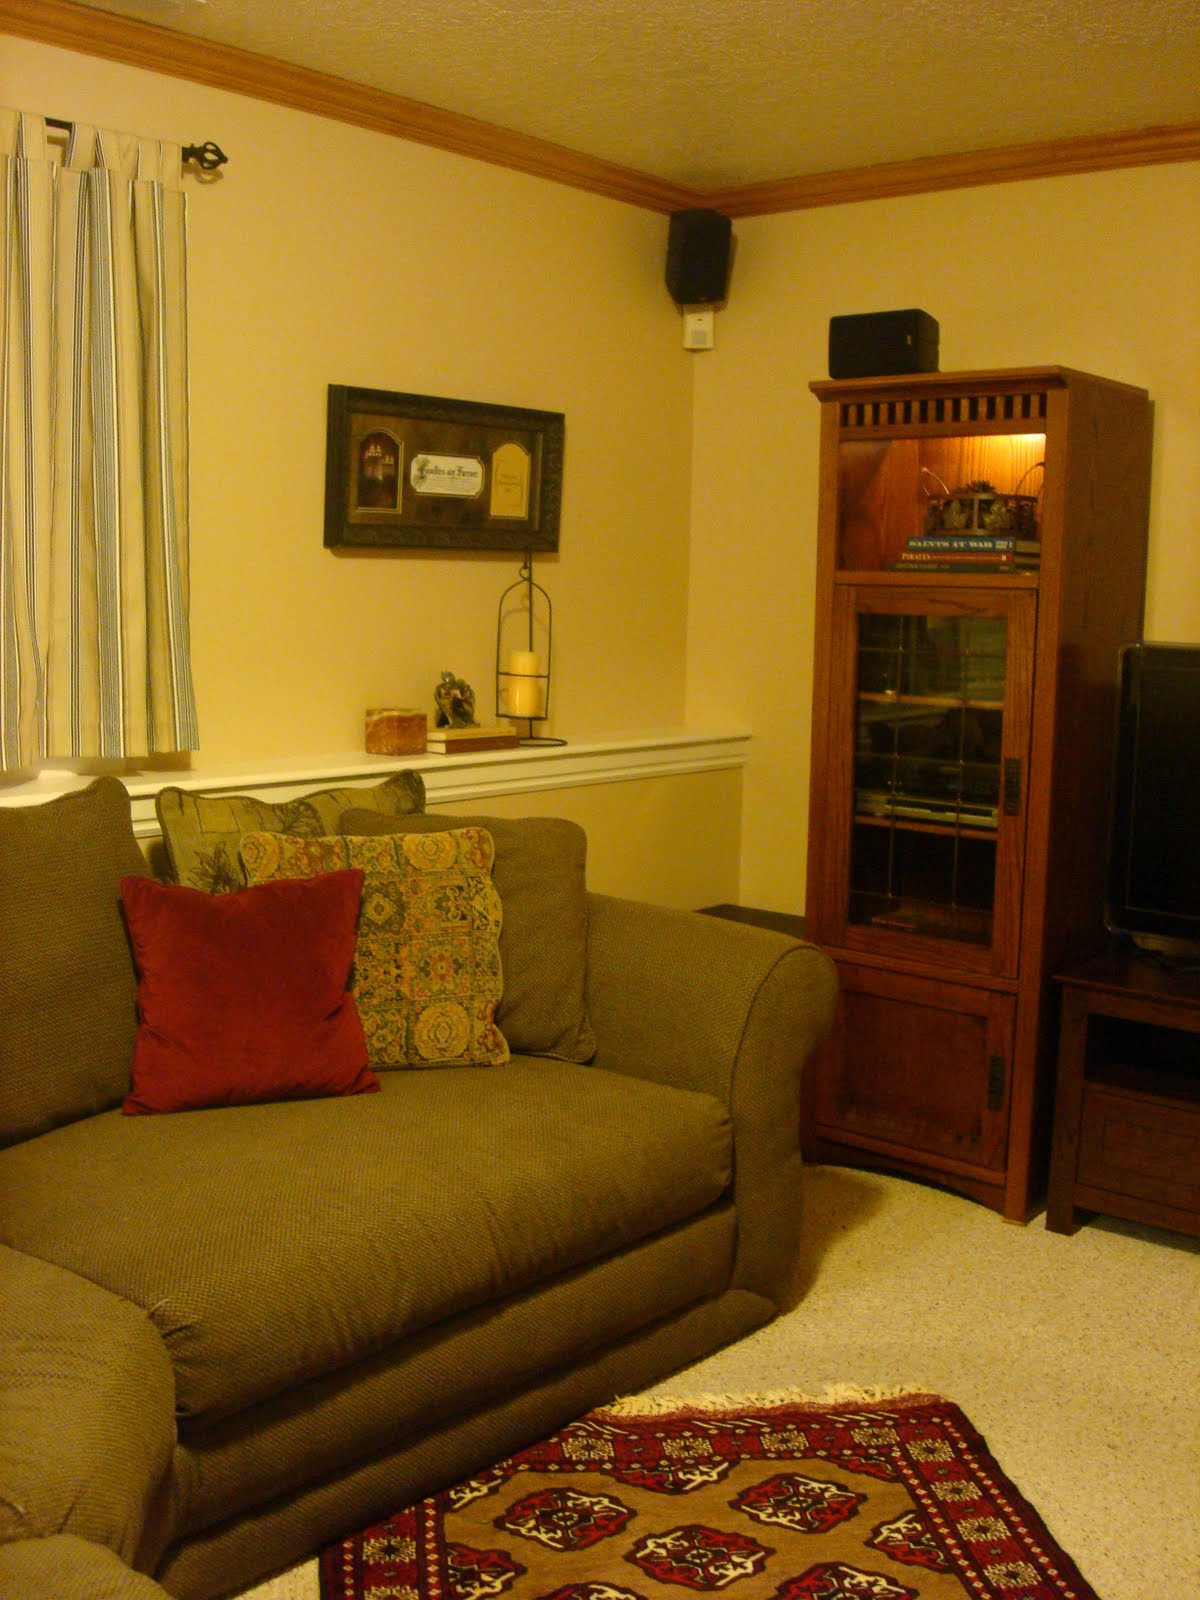
This family room had been waiting to "feel like home again".

BEFORE
Notice the white walls. There is not really a focal point--a place to rest your eye as you enter the room.

AFTER
This redesign also got a little paint job! If you look on the shelf under the window you will see the white moulding. The room now has a warm coat of paint.
Paint really can create a nice warm feeling in a room.

The entertainment center is now positioned on the back wall and becomes a focal point as you enter the room.

BEFORE
This family room doubled as an office as well. The desk was quite large and blocked the flow from the kitchen.

We removed the large piece off the top of the desk so we could let in more light and have it connect better with the kitchen.

The office now takes up just the back end of the room. We were able to seperate the two areas by turning the sectional.

Also see how we added some touches of red. It really gave some life to the space.
Go back and see where we put in a few natural elements, and do you see any additional lighting?
Let me know what you think!
I am joining the blog party at THE INSPIRED ROOM, set what else can be inspiring!
Subscribe to:
Posts (Atom)