


Monday, November 30, 2009
 Just a quick BEFORE and AFTER
 The Brown wall BEFORE
 We changed it up a bit by adding a shelf.
Notice the same family photo, but now with a few more details and interesting items.
We created somewhat of a theme based around a family vacation and items that they brought home. The fabric really adds a homey feel. Also notice how we have different heights on the shelf. And see how just propping up some framed photos works very nicely.
For more BEFORE and AFTERS go to Metamorphosis Monday
Tuesday, November 24, 2009
I did a Studio 5 TV segment today:
6 Simple Steps to Create an Inviting Entry
1. Hang a Mirror
A mirror creates more light in the space and is nice to use as you come in and out of your home.
2. Have some kind of table.
If you have room, this is a great addition. It can be something you may not have considered (a dresser or an old sewing cabinet). If you have a small space and cannot fit a table, hang a shelf under a mirror, it works great as a place for your mail or your keys.
3. Put a lamp or a pair of lamps on the table.
It adds to the warm and inviting feel that you want to create.
4. Incorporate a natural element.
A plant or a vase of flowers works nicely!
5. If you have room---add a chair or two.
It is nice to have a place to sit while you are putting on your shoes.
6. Make it your style!
The entry is an introduction to your home.
Thank you so much
to Susan, Deanna, and Ann for letting us film in there homes!
Sunday, November 22, 2009
 Consider hanging your family photos in a grouping on the wall with a few other items.
 BEFORE
This is a very usual way of hanging up family photos---lining them across the wall.
 AFTER
AFTERBut when we mix them in with the curio cabinet that also has some family photos and a larger wall clock, it creates a "unit" --- and a nice even weight to the wall.
Look around your house and see what creative ways you can display your family photos!
I am joining Susan at Between Naps on the Porch for Metamorphasis Monday, there are some great befores and afters.
Saturday, November 21, 2009
 I usually talk about using odd numbers when decorating...
but using PAIRS is a great way to create balance in a room.
And lends itself to a more formal feel.

A Pair of Chairs
 A Pair of Trees
 A Pair of Sculptures
bhg
 A Pair of lamps
bhg
 A Pair of Vases filled with grass.
 A Pair of Niches
A Pair of Chairs
A Pair of Pillows
A Pair of Topiaries
Sometimes using a Pair is an easy way to create a feeling of balance in a room.
Sometimes using a Pair is an easy way to create a feeling of balance in a room.
I am joining Julia at Hooked on Houses today.
Thursday, November 19, 2009
 My last post was an I-Spy activity ---
 Thank you to all those who commented.
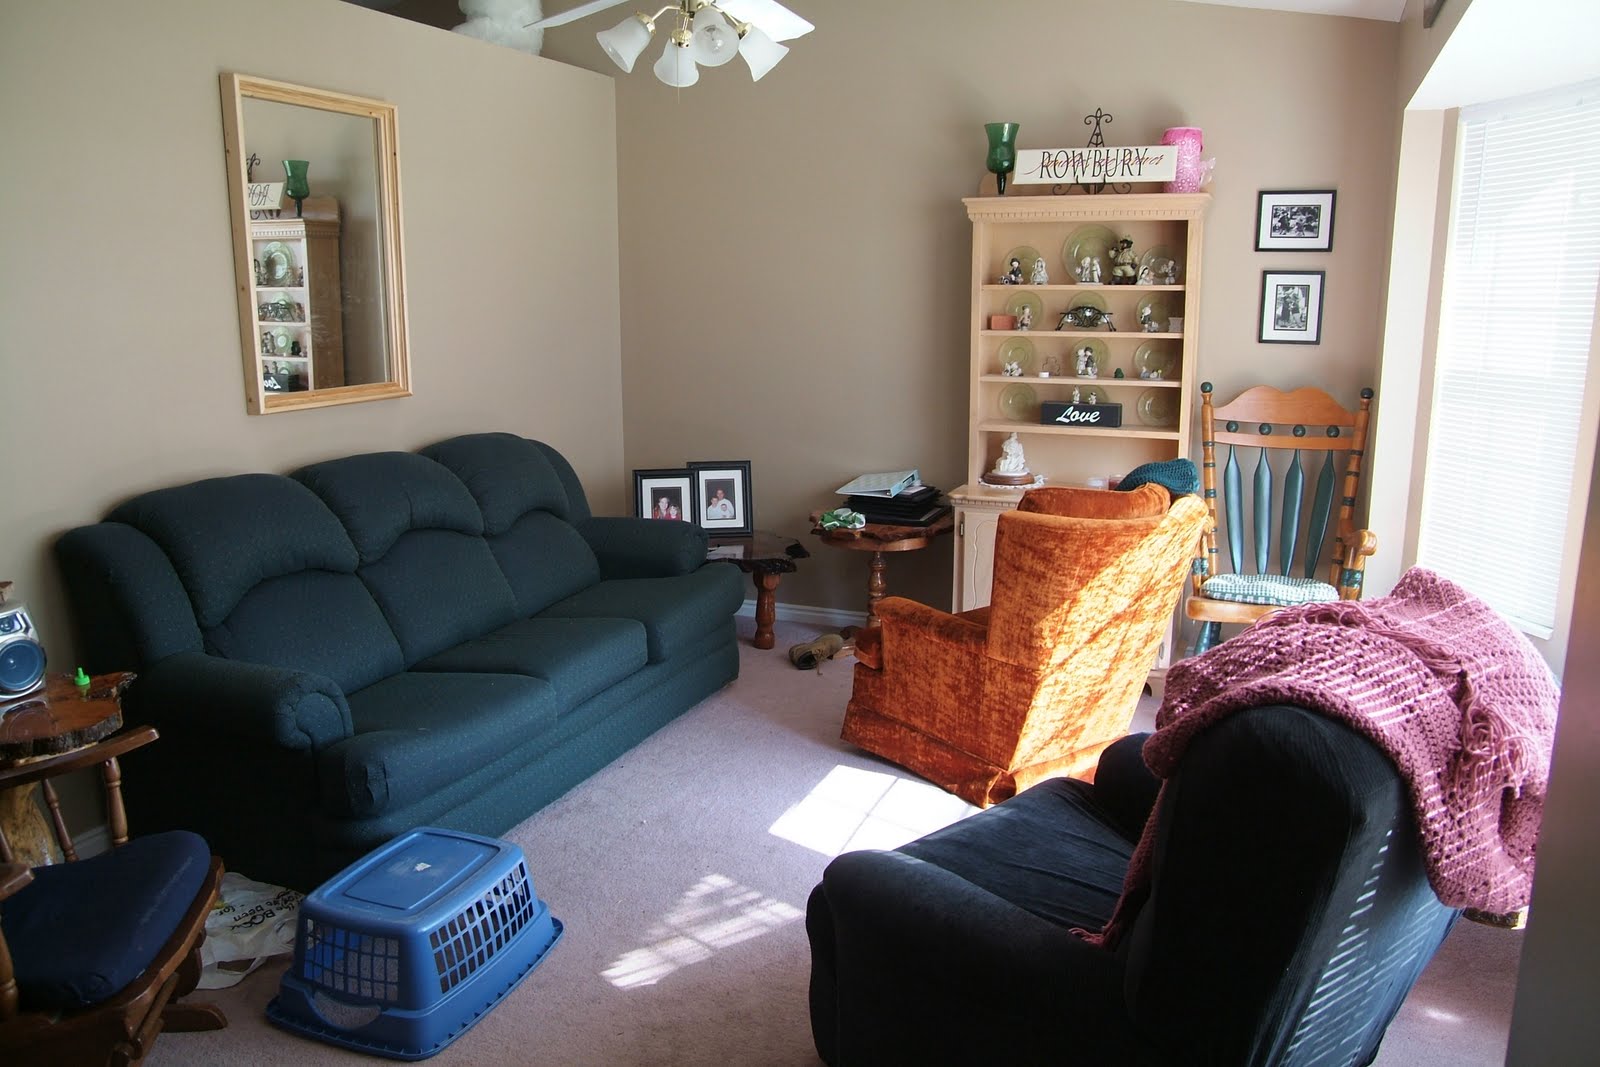
We are going to look at this living room and talk about what things made the difference in the BEFORE and AFTER
 BEFORE
 AFTER
AFTER1. The furniture was rearranged
so the room is more balanced on each side
2. We edited out a number of items --
less is more usally always works
3.You now notice these beautiful tables
the homeowner's husband and father-in-law made them-- in fact there used to be 4 in the room
4. We created a "unit" on the wall behind the couch.
She did paint the mirror frame black and we hung it horizontal
5. We added a lamp --
it came from the little boy's room and it does make the room feel more cozy
6. Notice on the table with the lamp
we have three items and they are different heights---lamp framed picture and plant
7. We centered the hutch on the long wall to create a focal point.
8. Of course the Rug is a wonderful addition
It came from the garage, the homeowner would have loved using it in the past but on the top 1/4 of the rug was a large embroidered tag labeled SAMPLE --- we just pushed that part under the couch and ta da! ... like magic the rug anchors the furniture and adds just the right colors to the room
 BEFORE
  9. We pulled the furniture closer
so that you have a nice conversation area
10.We added a green throw blanket on the chair
which ties in nicely with the colors in the room.
11. The side table has a plant and some books
All of these changes were done with just what she had in her home.
Isn't that fantastic!
You can do an I-Spy at your house too, just take these simple ideas and YOUR stuff and see what you can create.
Of course I would love for you to e-mail me before and after shots!
I am joining in Transformation Thursday at The Shabby Chic Cottage.
Monday, November 16, 2009
 I have good brain exercise for you today!
Look at these BEFORE and AFTER shots and see what made the difference.
It is kind of an I-Spy game---
 BEFORE
 AFTER
AFTER BEFORE
 AFTER
AFTERI will give you the answers on my next post ---
Have FUN!
I am linking up today with Susan over at Between Naps on the Porch.
There will be all kinds of before and afters!
Thursday, November 12, 2009
 Do any of these items look familar?
 This is a Living Room BEFORE that I have shown you.
 Here is the AFTER.
 The same AFTER just a little closer up.
This client moved to a new home. We took her same things and reinvented another cozy Living Room! I thought it would be fun to show how you can take what you have --move it to a new space and see what you come up with.
 Here is the NEW Living Room.
What do you see that we used in both rooms?
 Here is the BEFORE.
AFTER
I showed you this room last week when we were talking about arranging art in a group.
There is no fireplace in this room, but there was a large wall that we could use to display all of the wonderful art that she had collected.
 The lamps sure to cozy up the space---
Have I told you all how much I love LAMPS!!
 Love the iron container on the ottoman, we were able to fill it with pinecones and a nice piece of pottery.
 The two oriental art pieces that were in the other house go so well here in the corner and as an addition we added an oriental chest that she loved.
 BEFORE
 AFTER
AFTERWhat do you see that is new?
What do you see that is old?

She found the lamp for $25.00 at a consignment store. Great find!

 Isn't that fun!
Go and check out some other Transformations at The Shabby Chic Cottage.
I am also linking up today with Finding Fabulous and the
Inspired Room.
Monday, November 9, 2009
 This little boy's room needed an update.
 BEFORE
It had been this way since he was about 2 --- and he was now 6.
 AFTER
AFTERWe pulled the bed out from the window and replaced it with a desk that was down in the basement. It was a perfect fit!
Notice how the rug really adds to the room.
 BEFORE
The dresser had a variety of items and the picture was hung rather high.
 AFTER
AFTERWe decided to create more of a sports theme
using what he already had.
The magnet board works great hung above the dresser so he can put photos from his soccer games. Notice how it is hung closer to the dresser and makes more of a grouping.
Also we are tying in the color red --- rug, magnet board, bedding.
 BEFORE
 AFTER
AFTER The desk was a great fit in that corner --- and more suited to a school boy.
 The colors of the books under the lamp and the cars makes for a fun element on the desk.
It pulls more of the red around the room as well.
 BEFORE
 BEFORE
Wednesday, November 4, 2009
 I often get asked how to hang groups of art on a large wall and make it look good.
 Here is one solution---
 Here is the space BEFORE
 AFTER
AFTERSee how this group fills the space nicely.

This is how we did it:
1. First we laid out the art on the floor and experimented with what we liked and then decided to hang the group more random than lined up.
2. We started with the largest piece in the middle, and moved the others around it.
3. We kept the distance between each piece about the same.
See how it feels like a "Unit" rather than a number of framed pieces on the wall.
It creates a nice focal point and you are able to use a few smaller pieces to fill a large space rather than having just one larger scale piece.
Give this a try at your house, it will help to make a cozy room!
I am participating in Transformation Thursday at the Shabby Chic Cottage---go on over and take a look.
Also go and see Melissa's Beautiful Life
Subscribe to:
Posts (Atom)
